Scaling Scheduled configuration
1. Introduction to Scheduled Auto Scaling for Auto Scaling Groups
Scheduled is a feature that allows users to create a schedule for scaling based on predictable changes in resource usage of the Auto Scaling Group. For example, daily traffic and application usage may peak, requiring more resources from 6 AM to 11 PM. During the remaining hours from midnight to 5 AM, the demand decreases significantly, almost to zero. In this context, users can plan to create a schedule for the scaling group. Scaling will be performed automatically whenever the scheduled time arrives.
To configure the Auto Scaling Group to perform scaling using a schedule, users need to create a Scheduled. This schedule will perform the scaling group for the first time based on the value of Frequency, which includes: Daily, Weekly, and Monthly.
To create a schedule, users must declare the time for making changes and the desired change values, including: Desired number of servers, Change servers in range. Until the Schedule becomes effective (with a status of Active), the service will automatically resize the group to the desired value configured by the user during the Change from – To time period. After the To time, the size of the group will revert to the value before the change was made.
When using a schedule for the auto scaling group, users should note:
- The execution order of the scheduled tasks is only applicable to the same group and does not apply to multiple groups together.
- Scheduled tasks typically execute within a few seconds. However, they may also be delayed by a few minutes to check the status of the group before performing the scale.
- The schedule will be effective from 12:00 AM of the start date until 11:59 PM of the end date. If the start date of the schedule is the same day as the creation time, the effective time will be 3 minutes after the creation time.
- Scheduled is an automation process for resizing the Auto Scaling Group. Therefore, resizing will require time for the Cloud Servers to be created.
2. Operations with Scheduled for Auto Scaling Group
2.1 Creating Scheduled for Auto Scaling Group
Step 1: Access the management interface: https://manage.bizflycloud.vn/auto-scaling/groups
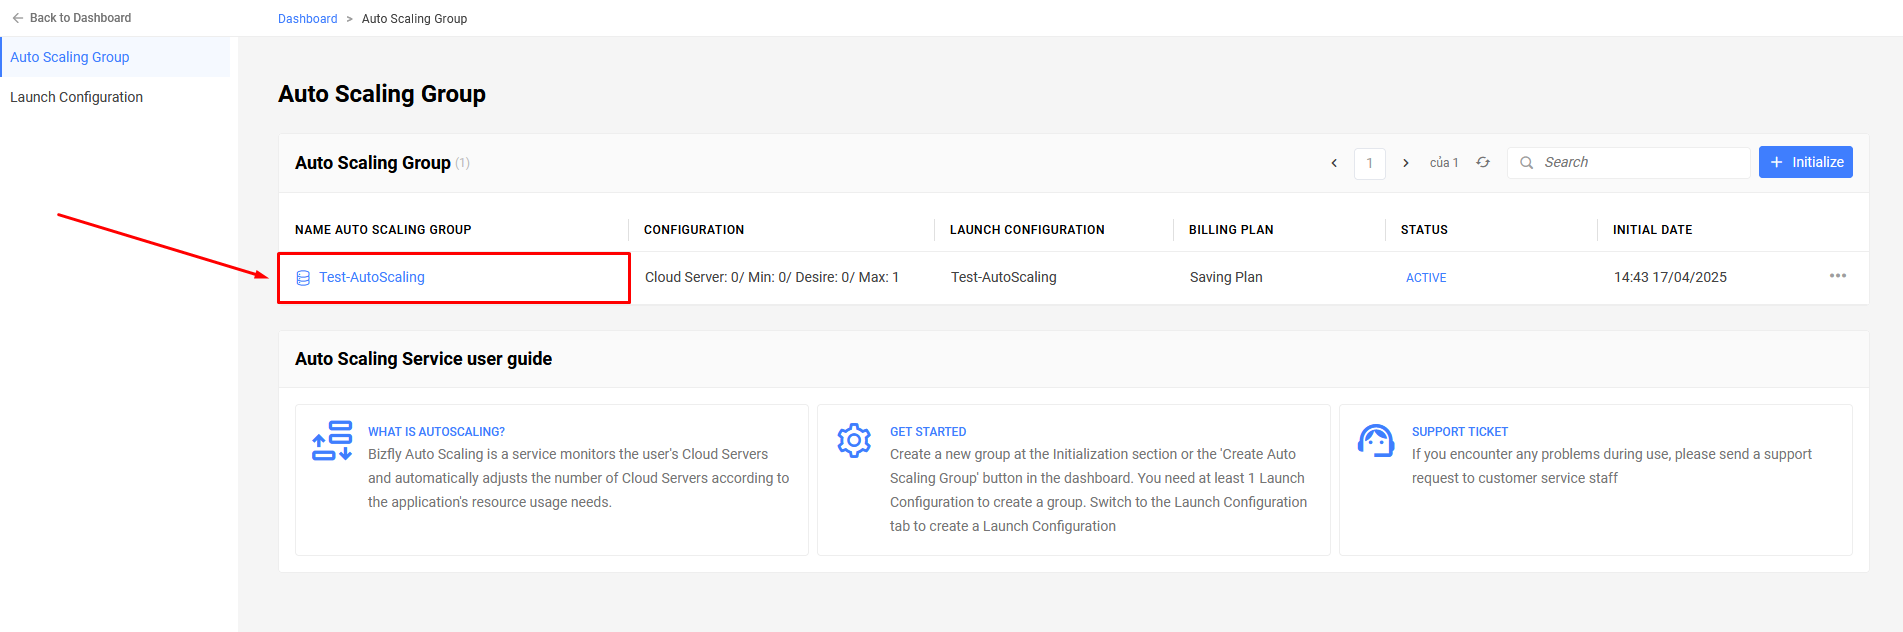
Select the Auto Scaling Group for which you want to create a scheduler. This selection will redirect you to another page, which has an interface to manage a specific Auto Scaling Group.
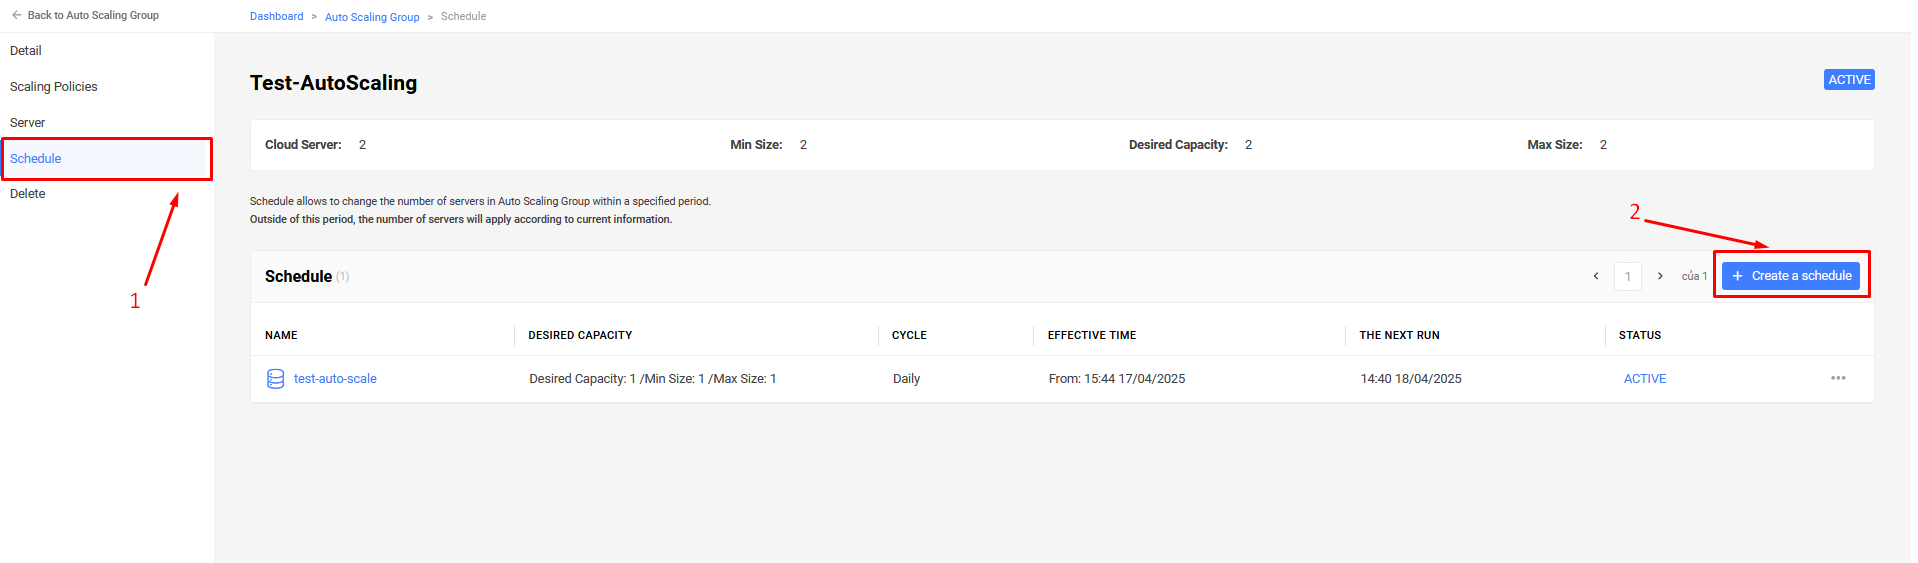
Step 2: On the navigation bar, select Schedule and then select Create Schedule.
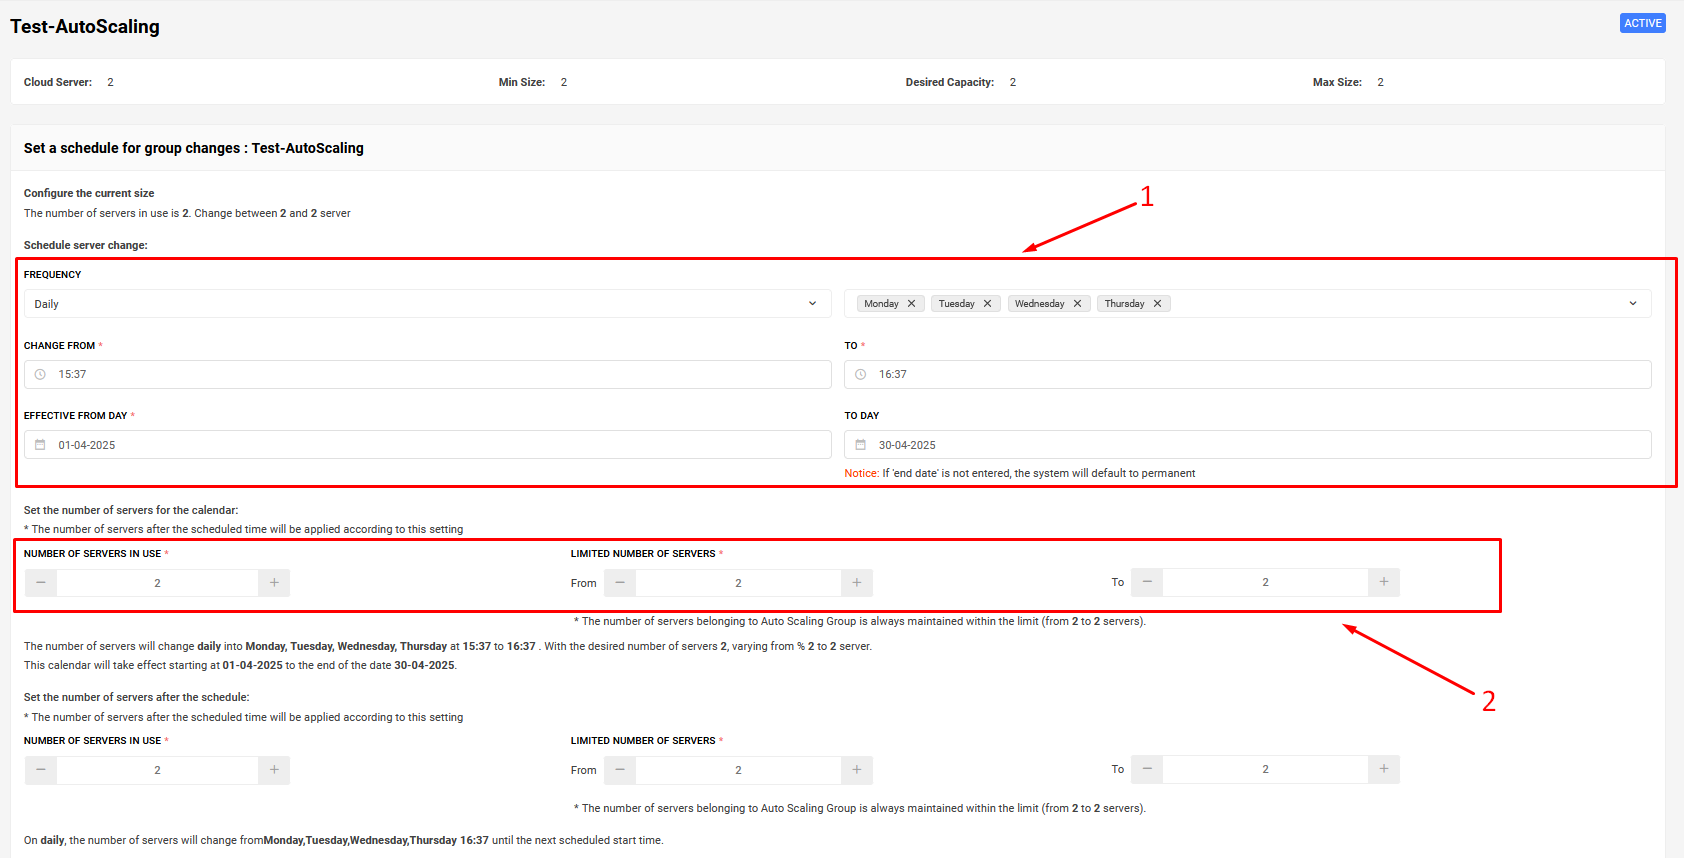
The detailed scheduling interface will display, allowing users to enter the values for the following information: Desired number of servers.
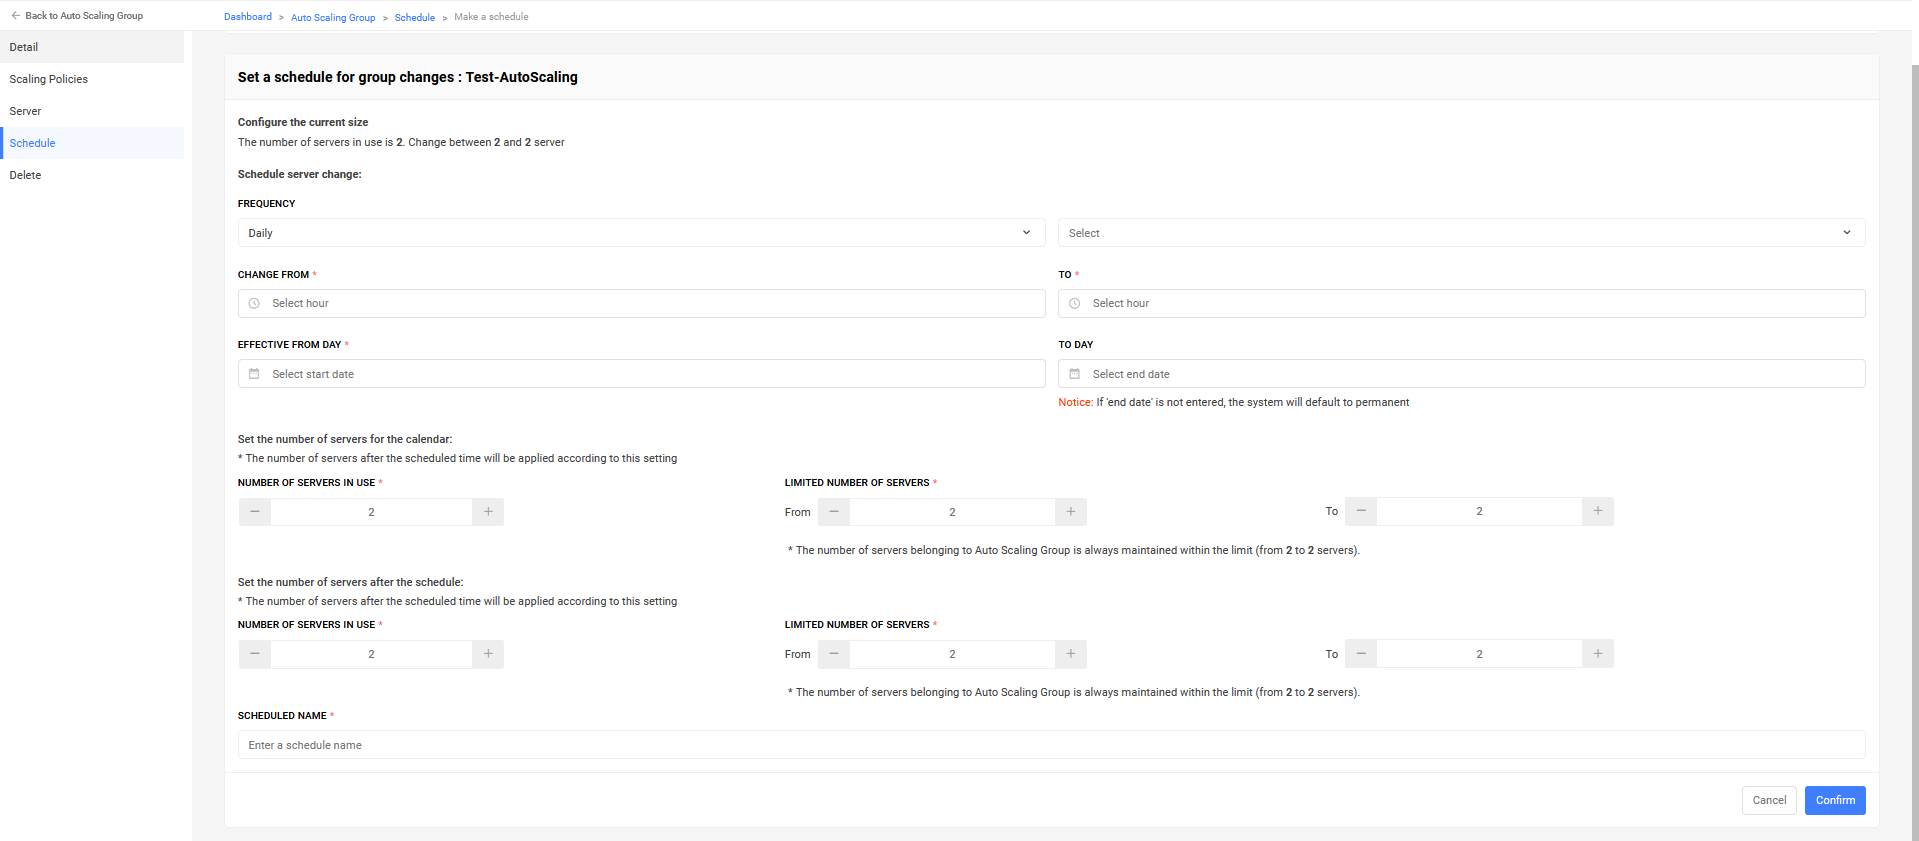
- Select a value for Frequency, which is the value that the scheduler will repeat at specified times.
- Select time values for Change from and To. During the Change from and To period, the schedule will resize the group according to the Change size configuration to. Outside this time period, the group will revert to its original size before the change.
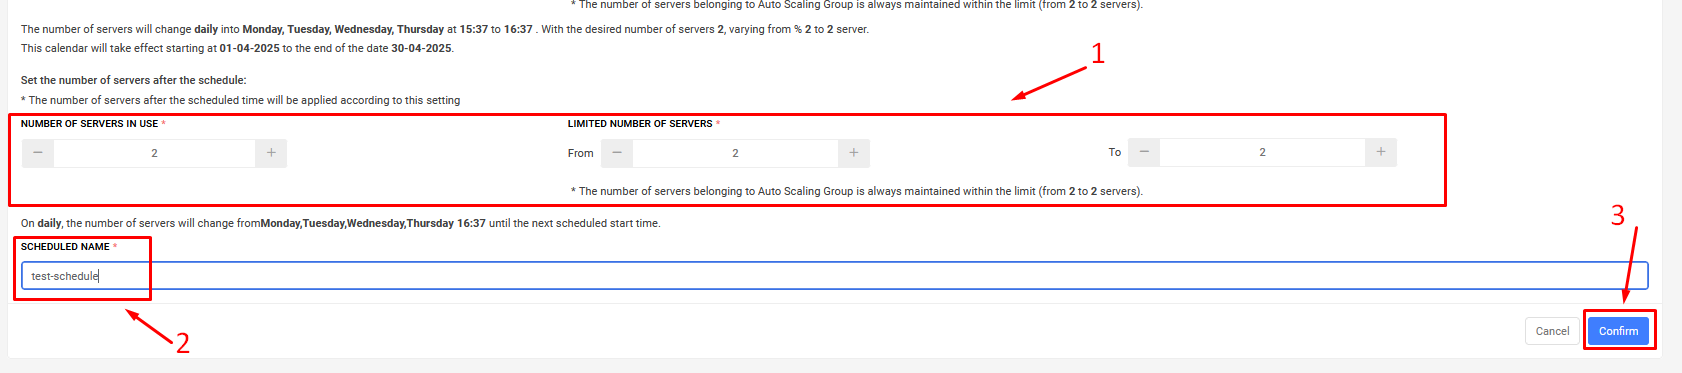
- Declare an additional value for Effective from date. The scaling time will take effect on the Effective from date. If the user declares a time value for To date, the scheduler will no longer operate after this time.
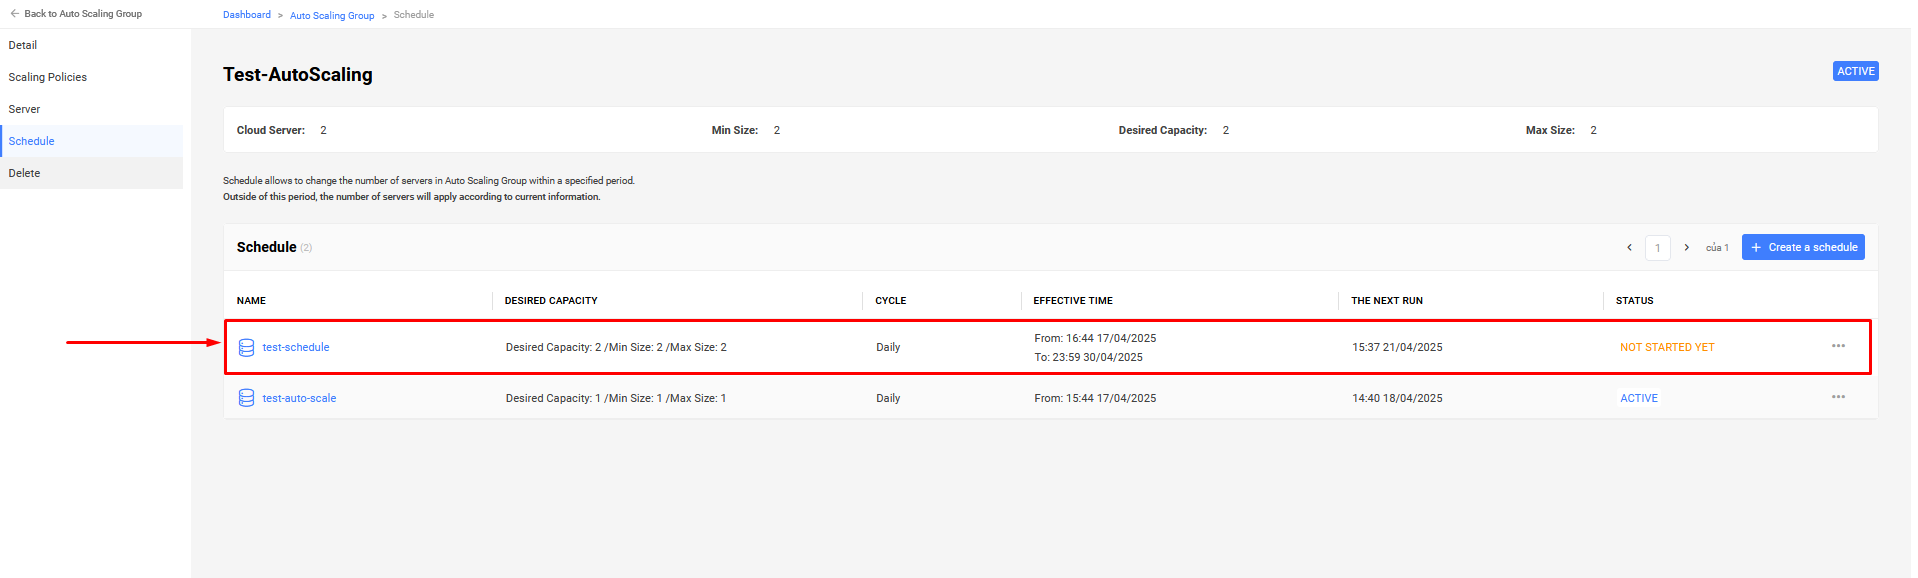
Result:
2.2 Deleting Scheduled for Auto Scaling Group
Step 1: Access the management interface: https://manage.bizflycloud.vn/auto-scaling/groups
Select the Auto Scaling Group for which you want to delete the scheduler. This selection will redirect you to another page, which has an interface to manage a specific Auto Scaling Group.
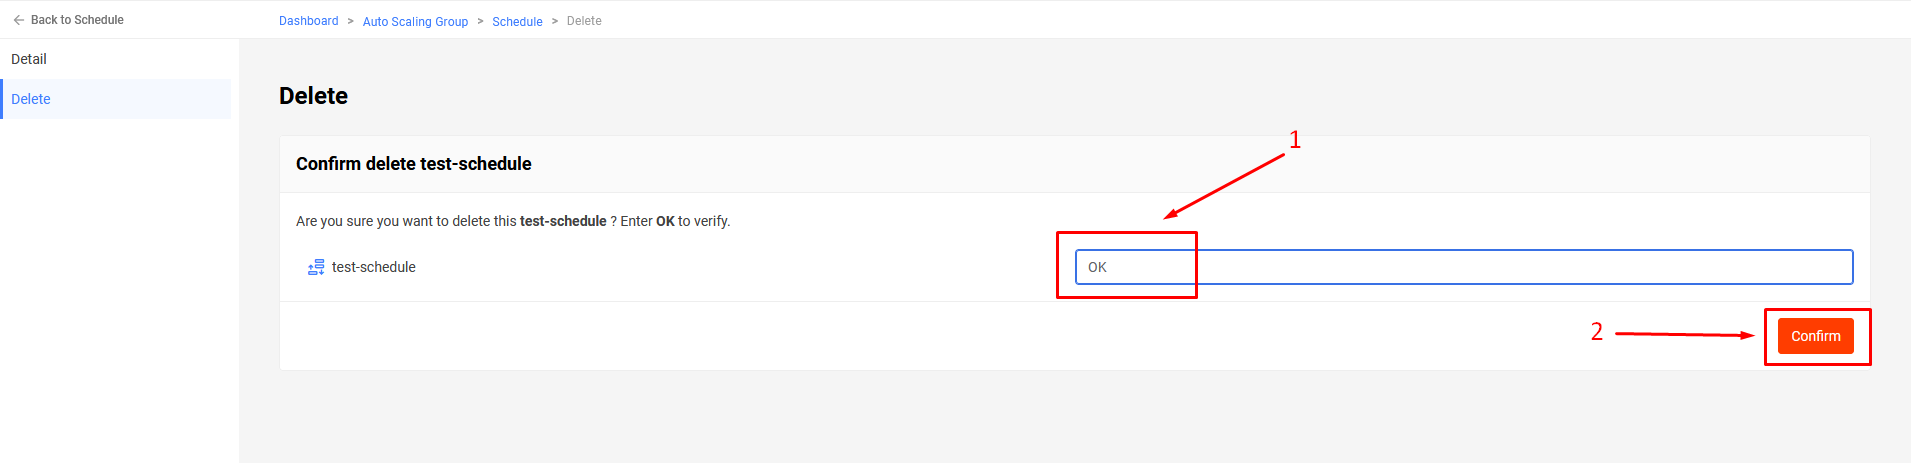
Step 2: On the navigation bar, select Schedule and select the scheduler you want to delete.
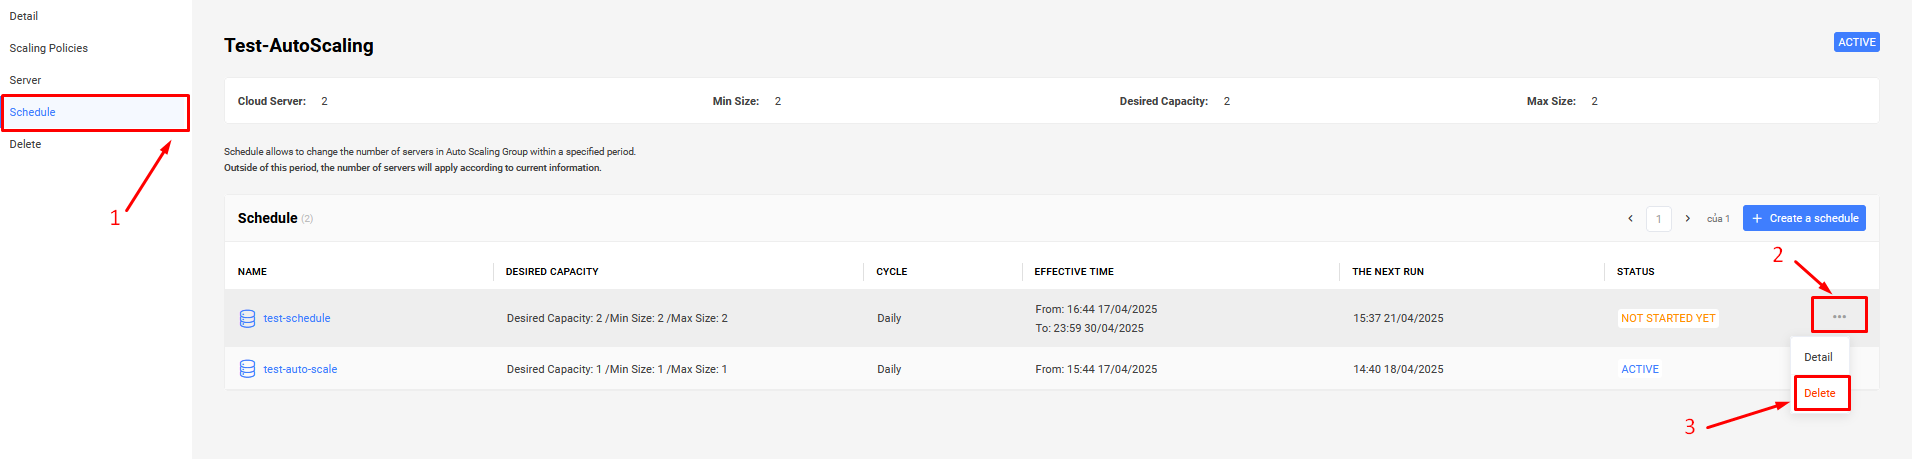
Enter OK to confirm delete.