WordPress Integration
Create a domain on the dashboard of Bizfly Cloud then the system will automatically create a CDN domain in the format xxxxx.cdn.vccloud.vn. You will use this CDN domain to integrate into your website. For websites using the WordPress platform, you can choose to use one of the following plugins for integration:
Use the CDN Enabler plugin (recommended)
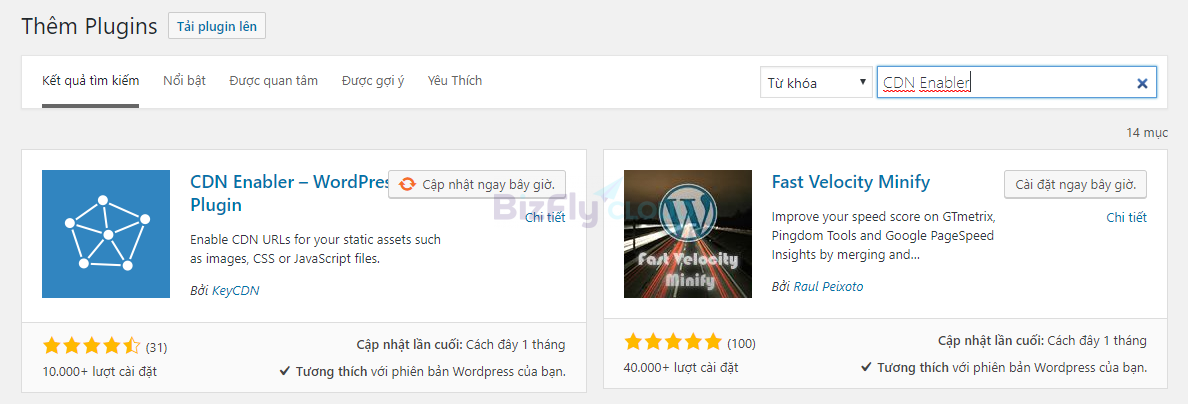
Step 1: Install the CDN Enabler plugin
Log in to your WordPress admin page. Select Plugins → select Add New → Type CDN Enabler in the search box. When the results appear, click Install Now. After installation is complete, click Activate for the plugin to work.
Step 2: Configure the CDN Enabler plugin
In the CDN Enabler Settings configuration section, enter the CDN domain in the box CDN URL.
Note: the CDN domain entered must start with the protocol http:// hoặc https://.
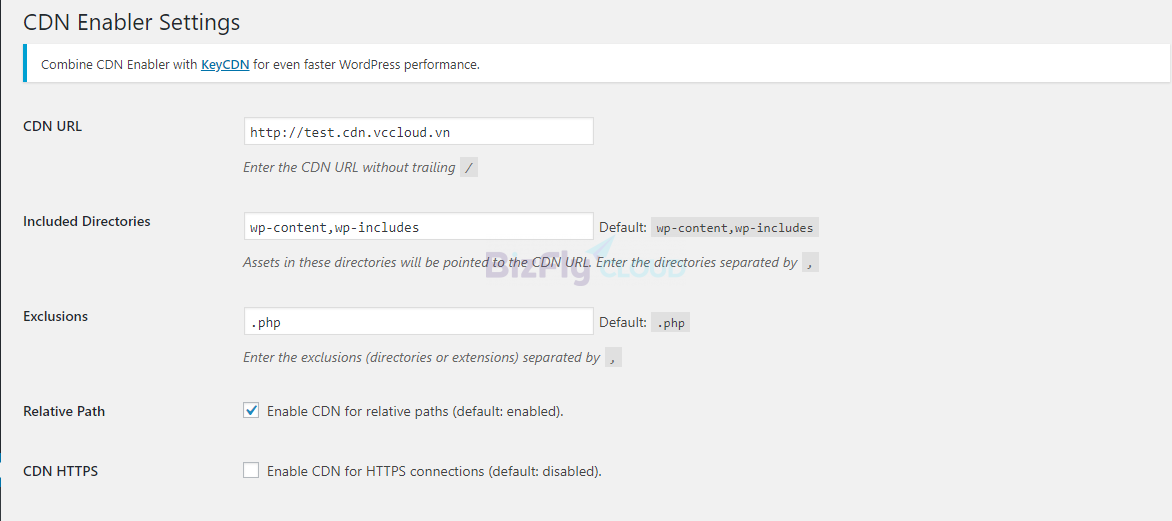
If the website uses the https protocol, check the box enble CDN for HTTPS Connections.
Step 3: Save the configuration and check if the CDN is working
Use the W3 Total Cache plugin
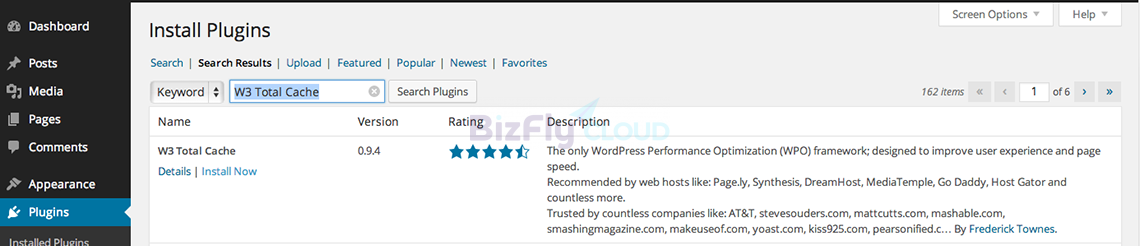
Step 1: Install the W3 Total Cache plugin
Log in to your WordPress admin page. Select Plugins → select Add New → Type W3 Total Cache in the search box. When the results appear, click Install Now. After installation is complete, click Active for the plugin to work.
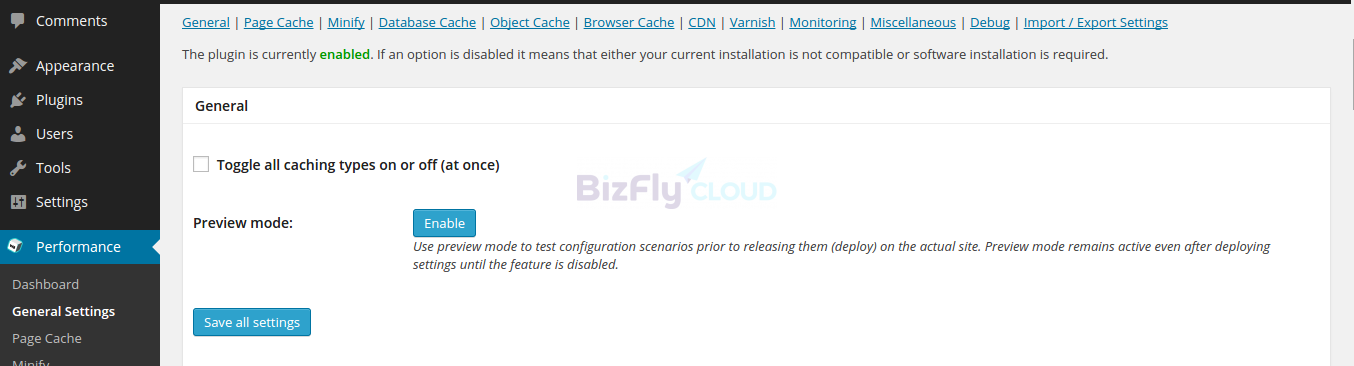
Step 2: Configure plugin W3 Total Cache
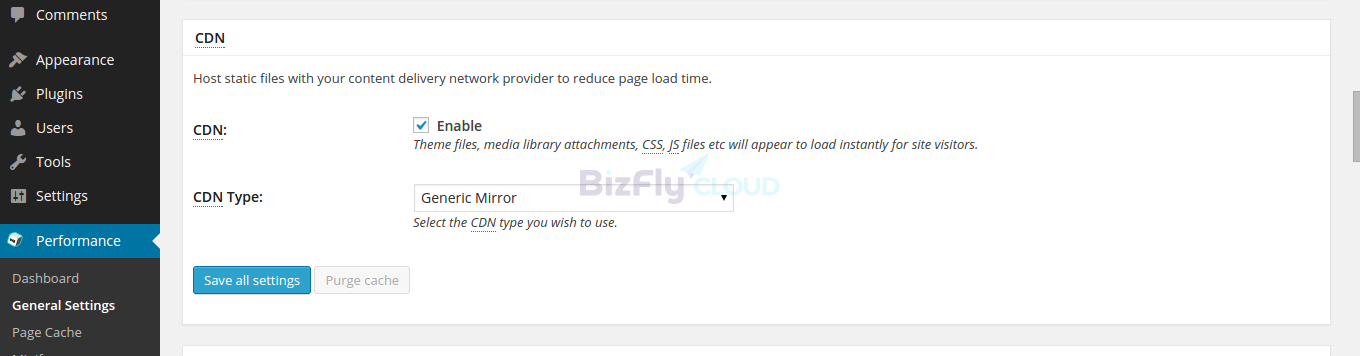
Select Performance → General Settings → Click on CDN on the main screen on the right.
After the CDN configuration section appears, check the Enable box and select Generic Mirror in CDN Type, then click Save all settings to save the configuration. At this point, a warning dialog will appear: A configuration issue prevents CDN from working. The “Replace default hostname with” field cannot be empty. Specify it here This is because the hostname has not been configured in the plugin.
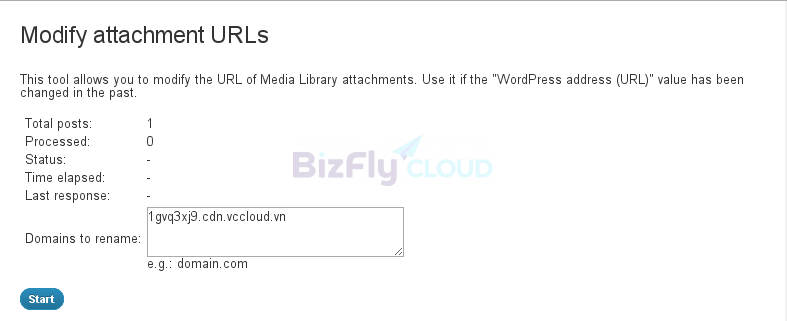
Select Modify attachment URLs, fill in the website domain and click Start
Step 3: CDN Configuration
Select Performance → CDN, In the Configuration section, fill in the provided CDN domain in the box Replace site’s hostname with
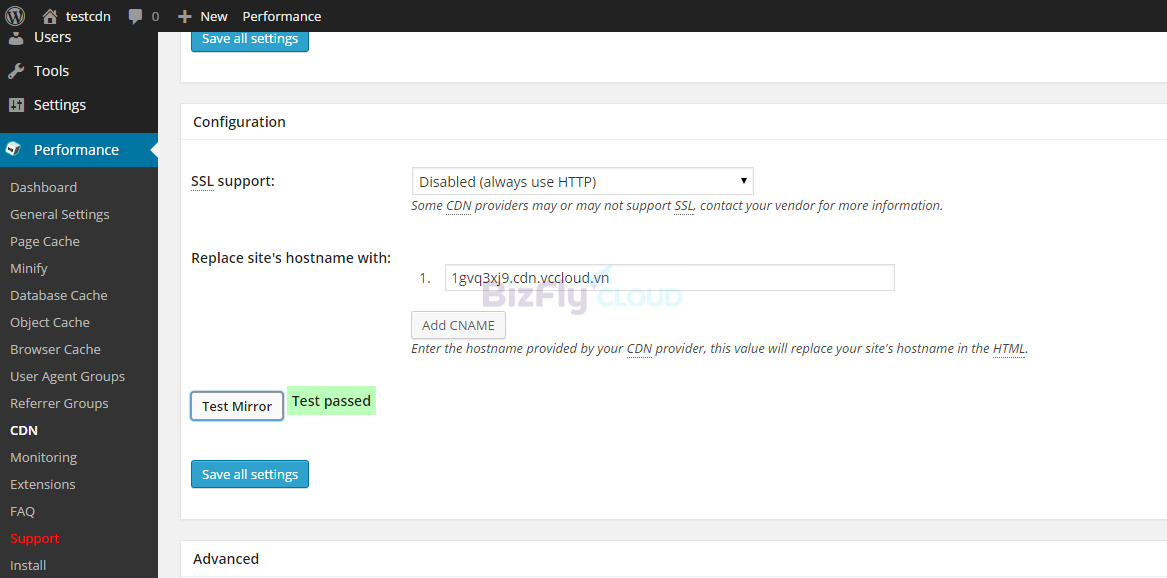
Then check the results by clicking the button Test Mirror
Use plugin WP Super Cache
Step 1: Install plugin WP Super Cache
- Log in to your WordPress admin page
- Select “Plugins” → select “Add New”
- Type WP Super Cache in the search box. When the results appear, select the plugin WP Super Cache By Automattic (http://automattic.com/)
- Click Install Now.
- After installation is complete, click Active for the plugin to work.
Step 2: Configure plugin WP Super Cache
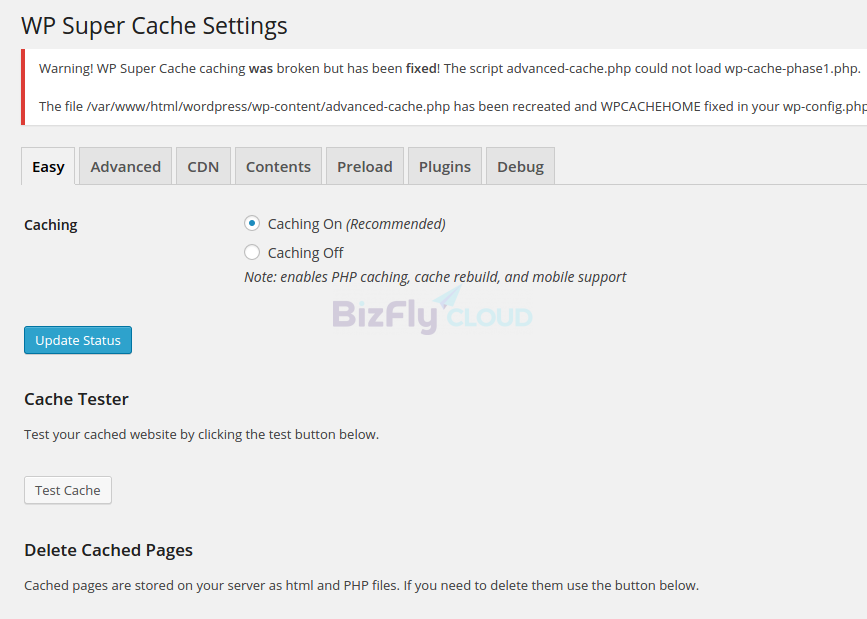
Select Settings → WP Super Cache

In tab “Easy” click “Caching On” and click “Update Status”
Next, switch to the tab “Advanced” and select the options that suit your blog. Check the boxes below:
- Caching:
- Cache hits to this website for quick access. (Recommended)
- Use mod_rewrite to serve cache files. (Recommended)
- Miscellaneous:
- Compress pages so they’re served more quickly to visitors. (Recommended)
- Don’t cache pages for known users. (Recommended)
- Cache rebuild. Serve a supercache file to anonymous users while a new file is being generated. (Recommended)
Then click “Update Status”
If you receive a notification asking you to “Update Mod_Rewrite Rules” then you scroll down and click the button Update Mod_Rewrite Rules

Next, switch to the tab “CDN” → Select “Enable CDN Support”
In box “Off-site URL” and “Additional CNAMES” you enter the provided CDN path
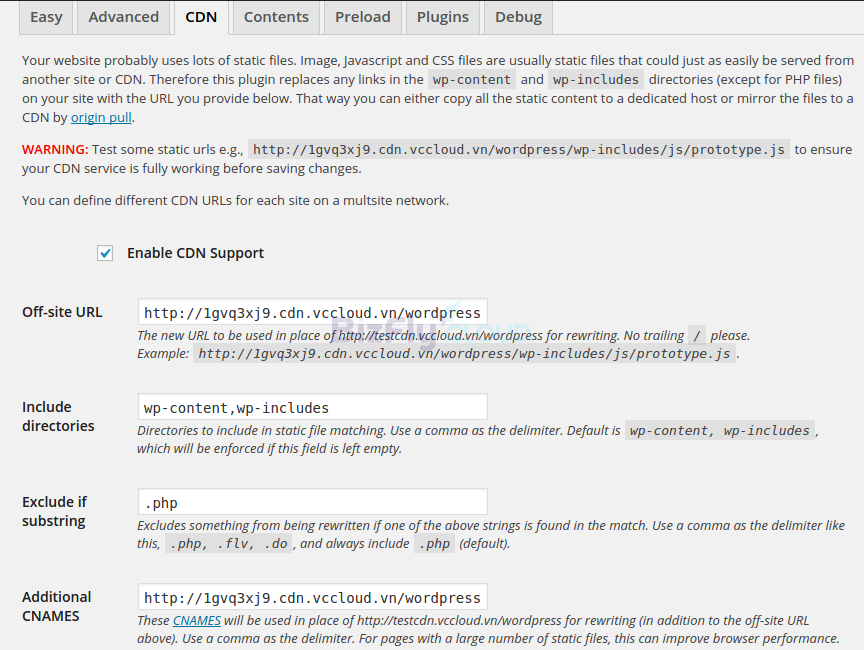
Click the box “Skip https URLs to avoid “mixed content” errors” and click “Save Changes.” to save the settings
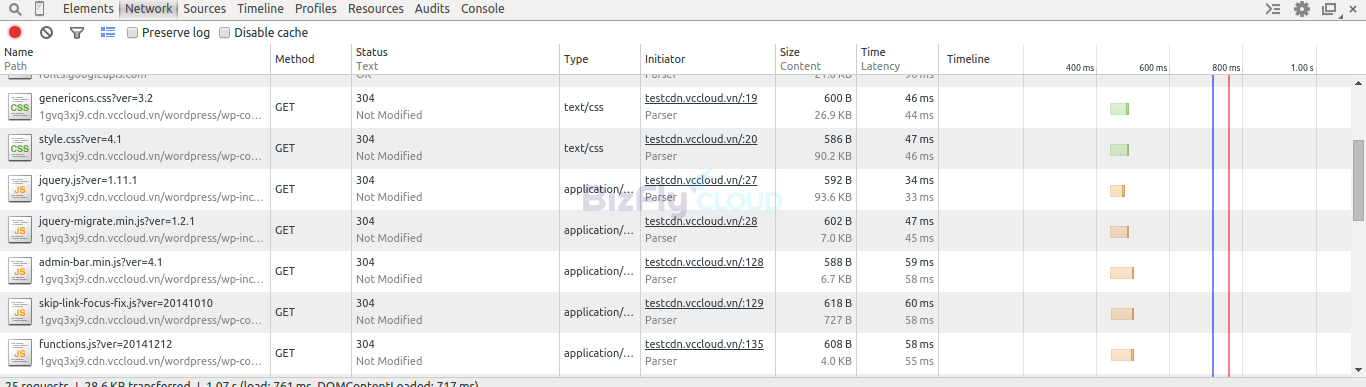
Step 3: Verify CDN is working
Use plugin Litespeed Cache
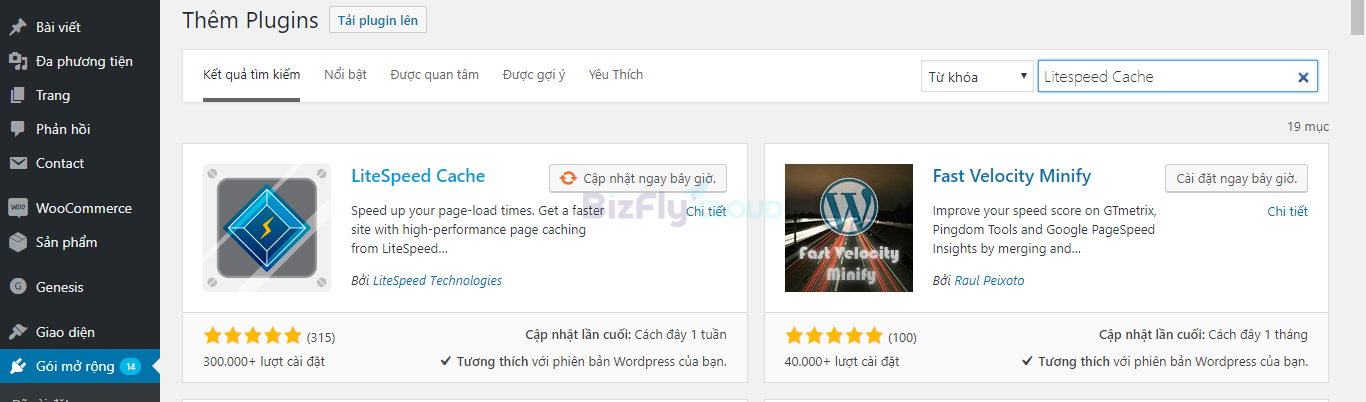
Step 1: Install plugin Litespeed Cache
Log in to your WordPress admin page. Select Plugins → select Add New → Type Litespeed Cache in the search box. When the results appear, click Install Now. After installation is complete, click Active for the plugin to work.
Step 2: Configure plugin Litespeed Cache
Select Litespeed Cache → Settings → CDN
For the Enable CDN select On
For the CDN Mapping, enter the CDN domain in the box CDN URL.
For the Origin URLs, enter the domain of the website.
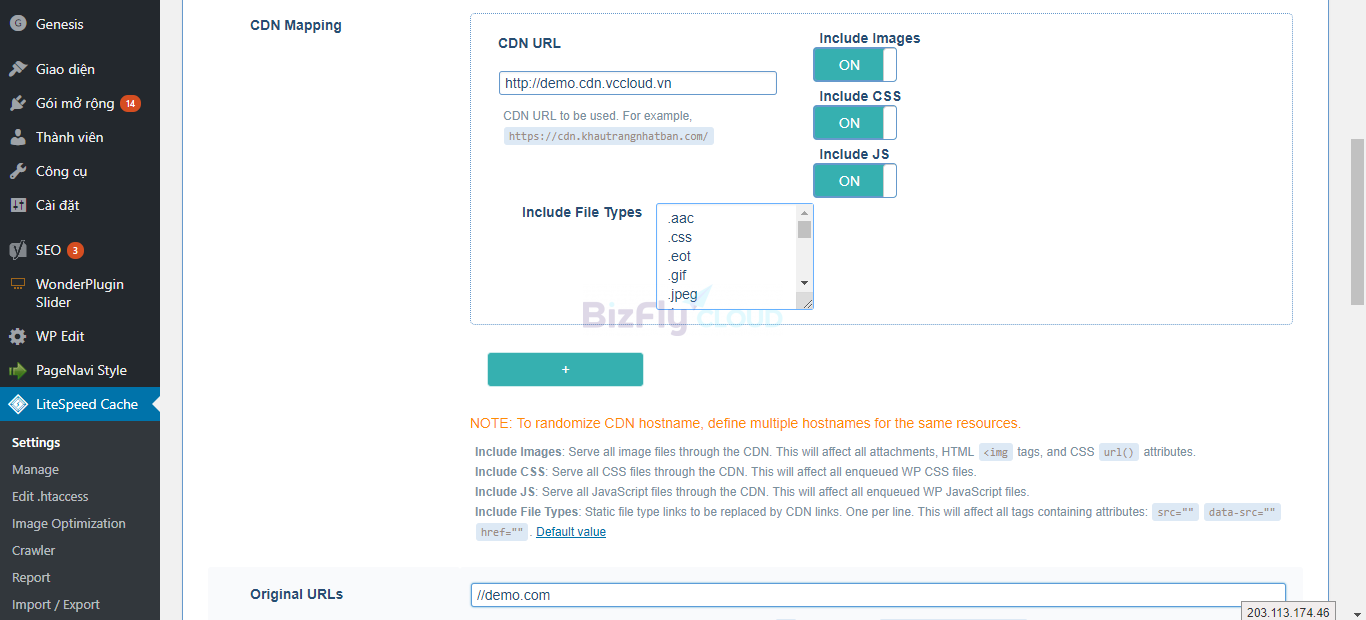
Note: The CDN domain entered must start with the protocol http:// hoặc https://
Step 3: Save the configuration and check if the CDN is working